Monday, November 19, 2012

Mindful Eating – An Interview with Dr. Michelle May – and Giveaway

Last week I had the chance to sit down and film a phone interview with Dr. Michelle May, author of the book Eat What You Love, LoveWhat You Eat. She’s a former dieter who came to realize how damaging this cycle of "eat, repent, repeat", is to our bodies. She teaches patients, clients and readers how to regain their love of food, while training them to eat mindfully and relearn how to trust their bodies to tell them how much food they really need.


She was so fun to talk to and this interview was exactly what I needed to keep me in the right frame of mind of ther holidays. I’m a firm believer in the kind of eating and living she’s talking about but it's so hard to stay focused and this was the perfect push in the right direction.

She also sent me a copy of her book and an extra copy to give away on the blog. If you’d like to read it so you can use her tips to sail joyfully through the food-laden weeks ahead, leave a comment on this post listing one physical activity you plan to do over the holidays or one favorite healthy snack idea.

Reading Eat What You Love, Love What You Eat has been really eye opening to me. Michelle May, MD is someone who gets what it’s like to not be at peace with food and has been able to transform her life and her relationship with her body and with food. The book can positively change the way you eat and how you feel. I love this book!

I want to be sure and give a big thanks to Coca-Cola for hooking me up with this interview opportunity!

Comments will close Wednesday night at 9pm PST and a winner will be chosen by random number generator. I will only ship within the US. Good luck!

Sunday, October 14, 2012

Quinoa Taco Meat


Yes, I'm obsessed with Quinoa. I love it. It delights me. It is my favorite grain.

That said... PLEASE START USING IT IN YOUR TACOS!

Or don't, and there will be more for me. More of the earth's quinoa for me is a good thing. :)

You can use it entirely in place of the ground taco meat, for a vegetarian option. You can cook two cups of quinoa with one packet of taco seasoning added to the mix, and add it as a meat substitute to your tacos...

But being a meat-loving sort of gal, I prefer to do it my way.

My favorite way is to cook up a pound of chicken breast chorizo, (you can substitute one pound ground beef and one packet of taco seasoning) and that way, the spices are already added to the meat. I brown it up with half a finely chopped onion, and then cook my quinoa separately in my pressure cooker. You can just cook it on the stove top the same way you cook rice, with two parts liquid to one part quinoa. I also prefer to cook the quinoa in beef broth, to add to the richness of the flavor.

Anyhoo...
Brown up your meat and seasonings. Drain, if your meat isn't super-lean.

 Add two to three cups of cooked quinoa depending on the ratio you like best.

And mix together. (My eight year old is drooling over my shoulder... raving about her love affair with this meat... and now she's laughing at me. Zut alors, the girl can read!)

 Pile it all up in a tortilla with lettuce, tomatoes, a little shredded cheese, sour cream, and beans of your choosing. (I prefer refrieds, or black).


And enjoy!
Quinoa Taco Meat
Cut and Paste Recipe


2-3 C cooked quinoa (cooked in beef broth)
1 lb ground meat (chicken breast chorizo, or extra lean ground beef)
1 packet taco seasoning (if your meat is not already pre-seasoned)

Cook the quinoa in beef broth. For stovetop cooking, add 2 parts water to one part quinoa. Bring to a boil, and then reduce heat to low, put lid on, and steam for 15 minutes more. 
Lift lid and fluff with a fork. 
Brown meat with seasonings. 
Mix together with quinoa.
Serve in place of regular taco meat. 

Enjoy!


Tuesday, October 9, 2012

Al’s Heavenly Cornbread


This recipe is my secret weapon. I’ve never eaten a more moist and delicious cornbread and everyone agrees. I cannot make this without being asked for the recipe, most recently by my parents when they were out for a visit in January.

Full disclosure – when you see the ingredients in this recipe, you will know why it’s so good. Not nearly as healthy as my sister’scornbread recipe, this one reads more like a yellow cake recipe with a bit of cornmeal mixed in. Thanks to my college roommate Alison for the recipe I adapted this from.
Mix your dry ingredients in one bowl. I usually sift them to eliminate clumps.

 
Mix your wet ingredients in another.


Pour dry ingredients into wet ingredients and stir until just combined. Bake in a greased 8x8 pan for 35 minutes at 350F.


I usually double this recipe and divide it into two pans. The second pan can be wrapped in plastic wrap and tinfoil and frozen for up to three months.

 
Cut-and-Paste Recipe
Al’s Heavenly Cornbread


½ cup cornmeal

½ cup wheat flour

1 cups all-purpose flour

2/3 cup granulated sugar

1 Tbsp baking powder

½ tsp salt

1/3 cup oil

3 Tbsp melted butter

2 eggs

1 ¼ cup milk
Combine dry ingredients in a medium bowl.  Combine wet ingredients in a large bowl.  Pour wet ingredients into dry ingredients and stir just to combine.  Bake in a greased 8” square pan @ 350F for 35 minutes.

Sunday, October 7, 2012

Pumpkin Alfredo Pasta


I love this recipe, adapted from the Our Best Bites cookbook. It's creamy, cheesy and decadent-tasting while remaining diet-friendly. You know we're all watching what we eat leading up to November/December's eight week eat-a-thon. Nearly everything I’ve tried from that book is amazing. It’s definitely worth owning.

Mix milk, cream cheese, flour and salt well in your blender.
In a medium skillet, melt butter over medium-high heat and add onions, chopped as small as possible. Cook, stirring frequently, until onions are translucent. Then add garlic, sage and thyme. Stir constantly for about thirty seconds.
Pour the milk mixture on top of the garlic and onions. Bring to a simmer, stirring constantly. Turn heat down to medium and let cook for a few more minutes, stirring frequently until sauce thickens. Remove from heat, add parmesan and stir to combine.
Cover the sauce with a lid and let stand at least ten minutes. Whisk in the pumpkin and warm over medium-low heat until heated through.
Serve over your favorite pasta. We chose shells and it was a huge hit. I will make this again and again.
Cut-and-Paste Recipe
Pumpkin Alfredo Pasta
12 oz of your favorite pasta
2 cups low-fat milk
1/3 cup low-fat cream cheese
2 Tbsp flour
1 tsp salt
1 ½ Tbsp real butter (divided)
3 garlic cloves, minced
1 cup freshly grated Parmesan cheese
1/4 C finely minced onion
1/2 C canned pumpkin (try more if you love pumpkin, this is really mild)
1T chopped fresh sage (1t dried leaves)
1/2 T fresh thyme (1/2 t dried leaves)
Cook pasta according to package instructions.

Mix milk, cream cheese, flour and salt well in your blender.
In a medium skillet, melt butter over medium-high heat and add onions, chopped as small as possible. Cook, stirring frequently, until onions are translucent. Then add garlic, sage and thyme. Stir constantly for about thirty seconds.

Pour the milk mixture on top of the garlic and onions. Bring to a simmer, stirring constantly. Turn heat down to medium and let cook for a few more minutes, stirring frequently until sauce thickens. Remove from heat, add parmesan and stir to combine.
Cover the sauce with a lid and let stand at least ten minutes. Whisk in the pumpkin and warm over medium-low heat until heated through. Serve over your favorite pasta.

Spinach Scramble


This is my default breakfast. When I don’t want to think about what to eat and I’m in a place where I’m eating well, I throw this together and it’s delicious and filling every time and packed with nutrients. It also comes in at under 300 calories. When I’m not in a place where I’m eating well, I eat cheese. Lots of cheese.

Place a skillet over medium heat. Add a teaspoon of olive oil, ¼ cup chopped onion, and 3 large sliced mushrooms. Mist veggies with cooking spray as needed to get a good sauté.  Cook until onions are translucent and mushrooms are nicely browned.


Add two large handfuls of spinach to the pan. This will look like an insane amount of greens, but don’t worry, it will cook down.
 
Then you can feel good about yourself and your nutritional superiority all day long. Stir the spinach constantly.


When the spinach has wilted, add two beaten eggs. If you’re lazy like me, you’ll just crack two eggs right into the pan and whip them up with your spatula as they cook. Keep the eggs moving until they're cooked and scrambled. There should be just enough egg to give you a shot of protein and sort of stick everything together.
Salt and pepper to taste and serve with your favorite salsa. I like to pour Pace all over the top of my scramble. So good. And your house will have that wonderful sautéed onion smell for a couple of hours.

Cut-and-Paste Recipe

Spinach Scramble


1 tsp olive oil
Cooking spray
¼ cup chopped onion
3 large mushrooms
2 cups baby spinach
2 large eggs
Salt and pepper
Salsa

Place a skillet over medium heat. Add a teaspoon of olive oil, chopped onion, and mushrooms. Mist veggies with cooking spray as needed to get a good sauté.  Cook until onions are translucent and mushrooms are nicely browned.
Add two large handfuls of spinach to the pan. Toss and stir to cook down the spinach.

When spinach has wilted, add two beaten eggs and stir until egg is cooked. Salt and pepper to taste and serve with your favorite salsa.

Thursday, October 4, 2012

Homemade Egg Rolls

Homemade Egg Rolls... Anyone hungry?

My cousin came over the other day and made these with me. They were delicious and delectable... and they had vegetables in them. That makes them healthy... even though we deep fried them, right?

So they were really relatively easy, just time consuming.

First we started by squishing together all the ingredients. The ground meat, veggies, and seasonings.

When we finished, it looked a little something like this:


We placed the filling into wonton wrappers, and rolled them up cigarette style.

Until we had a nice pile...

You want quite a few. Believe me, these babies go fast.

Then we set up outside on the deck, to avoid making the whole house and everything in it smell like frying oil.

We waited for the oil to heat up. My cousin tested the oil by putting a scrap of egg roll in and seeing if it started to bubble and float. When it was ready, we fried the egg rolls.

We had to avoid putting in too many at a time, or the oil cooled down too much from all the filling.
When the egg rolls were golden and bubbly and crispy, we took them out and drained them on plates lined with paper towels.

We served them with sticky rice, steamed cauliflower, and homemade sweet and sour sauce.

Delicious!


Cut-and-Paste Recipe

Homemade Egg Rolls

1 lb raw ground beef (as lean as possible)
1 C shredded cabbage
1/2 C shredded carrots
2 T soy sauce
1 T shredded fresh ginger
1 tsp salt
1/2 tsp black pepper

Wednesday, October 3, 2012

Veggie Enriched Chili - My Husband's All-Time Favorite

Our favorite healthy chili recipe.

Perfect for a fall night. Stuffed full of healthy veggies, and using up some of those zucchinis the size of your arm. From my calculations, a mere 135 calories per 1 C serving, and full of nutrients and low on fat. It also freezes wonderfully. I cook it in my big 8 quart stock pot, because I need lots. I love this chili.

My husband just might marry this chili if he and I ever call it quits.

Soooo... now that I've over-sold it. Enjoy!

Oh... and it's simple to prepare. Especially if you have the right magical kitchen equipment.

Start by browning the meat, and while it's cooking, toss in the finely chopped onion, zucchini, garlic, jalapeno, and bell peppers. 

If you want to simplify your life, buy this food chopper. Only $16.95, and I use it for everything. With its help, I can finely chop all these veggies while the meat is starting to brown, and easily get them all chopped in under 10 minutes. And they are the size of the ground meat bits. Teeny, camouflaged vegetables. See:


Those used to be baby carrots! (P.S. Feel free to substitute finely chopped carrots in place of some of the veggies in this recipe. They are perfect in it, and made it into this particular batch I photographed.)

Anyhoo. Let that meat brown with those veggies until the meat is cooked through and the veggies are getting tender. About 20 minutes.

Then add the beef or chicken broth, tomatoes, and spices, and let simmer for another 20.


Near the end, throw in your beans, corn, cilantro, lime juice, and finally, mix in your tomato paste to thicken.

And voila! Your chili is ready to be topped with some shredded cheese, sour cream, and served with a side of whole wheat corn bread or tortilla chips.

Cut and Paste Recipe

Veggie-Enriched Chili

1.25 lb extra lean ground beef or chicken breast chorizo   
1 Cup finely chopped onion
8 Cups finely chopped zucchini
1 finely diced or puréed jalapeno pepper
1 T minced garlic
3 finely chopped green or red bell peppers
2 T granulated sugar
9 tsp beef bouillon and 9 C water (or 9 cups broth)
3 cans diced tomatoes
1/2 T paprika
1 T chili powder
1 T cumin
2 cans tomato paste
3 Cups cooked black beans
3 Cups cooked Great Northern Beans
3 Cups canned or frozen corn kernels
1 bunch finely chopped cilantro
1/4 C lime juice

Cook first six ingredients until meat is cooked and veggies are tender. Add spices, broth, and diced tomatoes and cook for about 20 more minutes. Then add beans, corn, cilantro, lime juice, and tomato paste, and let stand about 10 minutes before serving.

Thursday, April 5, 2012

Vegan Cooking with Chloe Coscarelli and a Look at Her Crème -Filled Chocolate Cupcake Recipe

I’m a little bit vegan sometimes. Other times, I eat nothing but lean meats and vegetables, eschewing bread, pasta and rice altogether. There are weeks when I make nothing but Indian food. I bounce around, trying to find a healthy mix and I’ve found some truly awesome recipes.

This month I’m hooked on Chloe Coscarelli’s new cookbook, Chloe’s Kitchen: 125 Easy, Delicious Recipes for Making the Food You Love the Vegan Way, which was sent to me for review. I’ve made several of her recipes and my family members, all major carnivores, are really enjoying most of them. We’ve even repeated a couple in the short time I’ve had her book.

Chloe has a way of making vegan cooking accessible and when you eat her recipes you don’t feel like you’re missing something. They’re full of flavor and not full of weird ingredients to compensate for the lack of meat and dairy.

I recommend the Barley Bliss Casserole, delicious, creamy home cooking with a sauce I think about long after I'm done eating it. This is a great healthy substitute for those old cream of chicken based comfort food casseroles.

We also loved her Guilt-Free Garlic Mashed Potatoes with parsnips and cauliflower. These were amazing and pumped full of veggies. I will definitely be making them again.

Also, she’s authorized me to post her "Chlostess" Crème-Filled Cupcake recipe for all of you to try. These were surprisingly delicious and if I can sub them out for my family’s favorite 300-unpronouncable-ingredient treats, we’ll be better off. I guess it shouldn’t surprise me that she makes a great cupcake. Chloe created the first vegan cupcake recipe ever to win the reality show Cupcake Wars. Try this recipe, check out her website, and then give her whole book a try. Enjoy!

cupcakes

“Chlostess” Crème -Filled Cupcakes
MAKES 14 CUPCAKES

Move over, you other name-brand cupcakes found in a little plastic bag! These are homemade, have half the fat, and are still crème-filled delicious! 

Make-Ahead Tip
The Chocolate Cupcakes can be filled with Crème Frosting and frozen for up to 1 month.

Thaw cupcakes and apply Chocolate Ganache topping and swirl design before serving. Any leftover Crème Frosting can be stored in the refrigerator for up to 2 weeks. 

CHOCOLATE CUPCAKES
1½ cups all-purpose flour*
1 cup sugar
1/3 cup unsweetened cocoa powder
1 teaspoon baking soda
½ teaspoon salt
1 cup cold coffee or water
½ cup canola oil
2 tablespoons white or apple cider vinegar
2 teaspoons pure vanilla extract
*For a gluten-free alternative, substitute gluten-free all-purpose flour plus ¾ teaspoon  xanthan gum

CRÈME FROSTING
1 cup nonhydrogenated vegetable shortening
3 cups powdered sugar
1 teaspoon pure vanilla extract
2 to 5 tablespoons soy, almond, or rice milk

CHOCOLATE GANACHE
1 cup semisweet chocolate chips (dairyfree)
¼ cup canned coconut milk, mixed well before measuring
2 tablespoons canola oil

To make the Chocolate Cupcakes: Preheat the oven to 350 degrees. Line two 12-cup cupcake pans with 14 cupcake liners. 

In a large bowl, whisk together flour, sugar, cocoa, baking soda, and salt. In a separate
bowl, whisk together coffee, oil, vinegar, and vanilla. Pour the wet mixture into the dry
mixture and whisk until just combined. Do not overmix.

Fill the cupcake liners about two-thirds full with batter. Bake for 16 to 18 minutes, or until a toothpick inserted in the center of a cupcake comes out clean with a few crumbs clinging to it. Cool the cupcakes completely before frosting. 

To make the Crème Frosting: Using a handheld or stand mixer, beat the shortening until
smooth. With the mixer running on low, add powdered sugar, vanilla, and 1 tablespoon
nondairy milk at a time, as needed, until frosting reaches a spreadable consistency. You
may not need to use all of the nondairy milk. Beat on high for 2 more minutes until light
and fluffy.

To make the Chocolate Ganache: Melt chocolate chips and coconut milk in a double boiler or microwave. Whisk in oil until smooth.

To assemble the cupcakes: Fit a piping bag with a small round or Bismarck tip and fill with the Crème Frosting. Insert the tip into the center of the top of each cupcake and squeeze the bag to fill the cupcake with about 2 to 3 teaspoons frosting. There is no need to scoop out any of the cake. Spread the top of each cupcake with a thin layer of Chocolate Ganache and pipe a 4-loop design with the Crème Frosting.

Friday, March 30, 2012

Mini Food Blogger in Training

She doesn’t blog about mini food. She is mini and she’s already thinking like a food blogger.

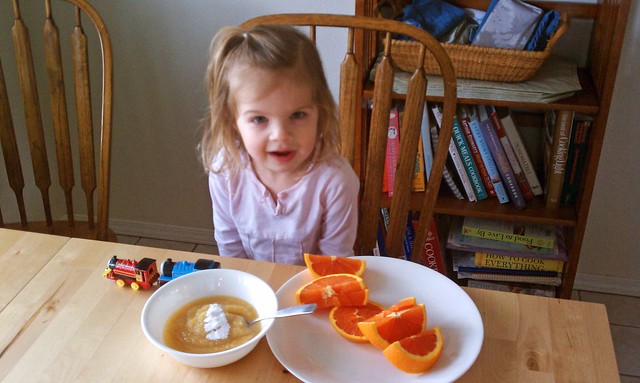
Today I told Wanda it was lunch time and she said, “I want lunch abouuuuuuut apple sauce!” She added that she also wanted apple slices of the orange variety. All sliced fruits are apple slices, just different flavors.
mini-food-blogger

The apple sauce is topped with probiotic powder or as we call it, “Sprinkles.” The Thomas train is not for consumption. Maybe I'll catch her with some protein or grains later. For now, I'm excited when she expresses interest in anything that's not candy.

I took this picture because once she’d laid out all the food, she said, “Okay, now take a picture of my lunch like this!” She staged and I shot. We are good team.

Monday, March 5, 2012

World’s Simplest Fruit Salad

Don’t let your fruit languish, my friends! I always seem to have a drawer full of sad fruit that nobody wants. When the berries and bananas are gone, we’re left with apples, oranges, melons and a scattering of fruits that no one’s excited to eat.
I’ve adapted Heather’s husband’s fruit salad recipe to help me deal with this problem. It’s probably overstating things to call this a recipe. It’s more of a preparation suggestion. However, I’ve made this for showers and parties and always get compliments and recipe requests. So, here it is:

Choose a sampling of fruits from your fridge, or if you’re making this for a baby shower or potluck, choose a sampling of fruits that look and taste good together from your local grocer. This is good, even if all you have are apples and oranges but it's fun to go a little more exotic every once in a while.

Chop the fruits into small pieces, the smaller the better. For example, grapes are ideal for this when cut in quarters.


Place all the fruit in a bowl.


Add a dollop of yogurt. Less is more here. You want just enough to moisten and flavor the fruit but not enough that you ever have “gobs” or white. No one wants “gobs” on their fruit salad. I prefer vanilla yogurt for this but I’ve used just about every flavor imaginable. Personally, if I’m using plain yogurt, I like to add a couple of tablespoons of applesauce or all-fruit jam to sweeten it a bit.


Gently stir to coat the fruit and you’re done!

I’ve served this as a side-dish at dinner in individual ramekins with a slice of orange on top and the kids can’t get enough. They will literally eat two to three times as much fruit when I serve it this way than when I simply chop it and serve it on a platter.

Cut-and-Paste Recipe

Simple Fruit Salad

4 cups fruit
¼ cup yogurt (vanilla preferred)

Chop fruit into small pieces, no bigger than half an inch. Place them in a bowl with yogurt and stir gently. Take a minute to wonder why you printed off this non-recipe recipe card.

Saturday, March 3, 2012

Honey-Lime Chicken

chicken2
Why did the chicken cross the road?

Because it was dinner time and the chicken was justifiably scared, considering how often we devour its kinfolk.

If you eat chicken as frequently as my family, you’re always looking for new ways to cook it. One of my favorites is this simple honey-lime preparation. With only five ingredients, all things I generally have around the house, it’s one of my go-to meals when I haven’t planned ahead.

It’s adapted from a Cooking Light recipe book I quite like.

Pour your soy sauce into a shallow baking pan, 8x8 or 9x13 depending on how much chicken you’re cooking.

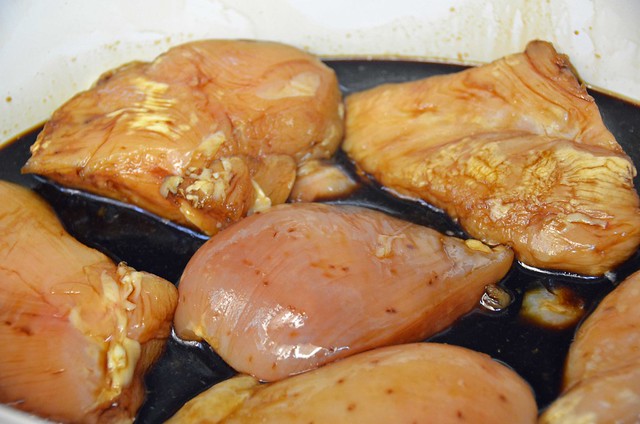
Place the chicken in the soy sauce and turn to coat.
chicken4
Bake on the middle rack at 350F for 30-40 minutes until done in the middle or until they reach an internal temperature of 165F. I almost always slice my chicken open to make sure there’s no pink in the middle.

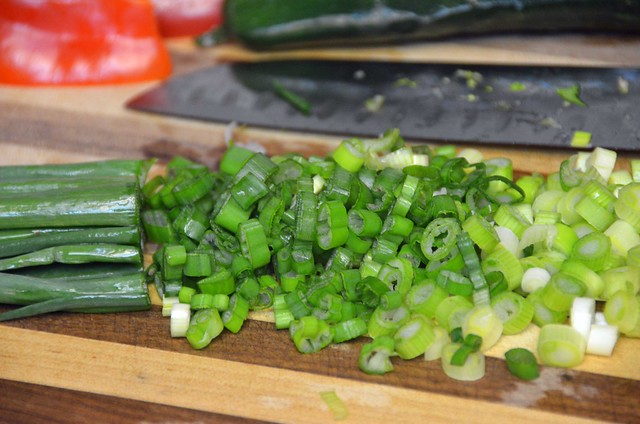
While chicken is cooking, chop green onions or chives and set aside. Measure lime juice and honey into small sauce pan.
chicken3
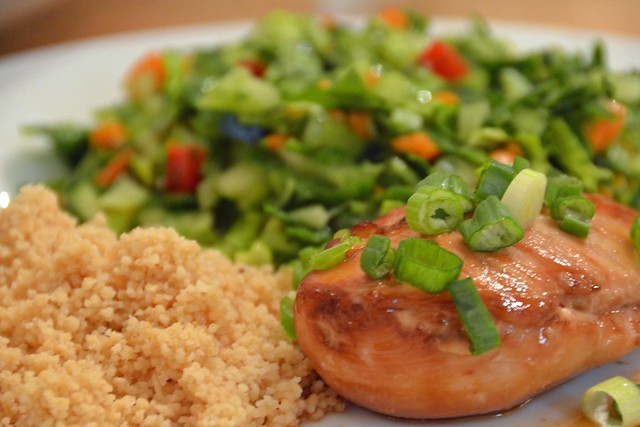
When chicken is cooked through, remove chicken from soy mixture and place on a serving dish. Add ¼ cup of the soy/drippings mixture to the honey and lime juice sauce pan. Heat them to combine and then pour over the chicken. Sprinkle with the fresh green onions and serve. This goes great with veggies, rice, quinoa, or even whole wheat couscous. 
chicken1

Cut-and-Paste Recipe

Honey-Lime Chicken

4-6 boneless, skinless chicken breasts
½ cup soy sauce
½ cup honey
¼ cup lime juice
One bunch green onions or chives

Preheat oven to 350F. Pour soy sauce into shallow baking pan, big enough to hold all the chicken pieces with some space between them. Add chicken pieces to soy sauce and turn to coat. Bake at 350F for 30-40 minutes until chicken is cooked through and no longer pink in the center.

While chicken is cooking, chop green onions or chives and set aside. Measure lime juice and honey into a small sauce pan. When chicken is cooked through, remove chicken from soy mixture and place on a serving dish. Add ¼ cup of the soy/drippings mixture to the honey and lime juice sauce pan. Heat them to combine and then pour over the chicken. Sprinkle with the fresh green onions and serve.

Thursday, February 23, 2012

Blue and Gold Banquet Dessert - Campfire Brownies with Chocolate Ganache

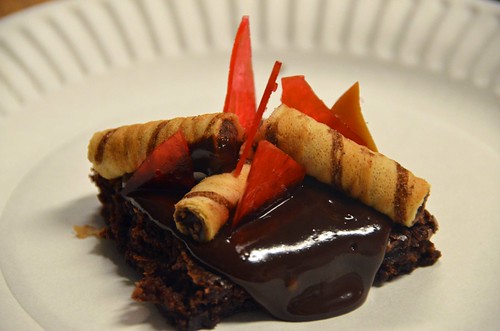
This week was the Cub Scout blue and gold banquet and our church youth group offered to make the dessert. I looked online for ideas and I didn’t find much. Take a cake. Frost it with blue and gold frosting. That’s no fun. So I modified this campfire cake idea I found on Pinterest.


campfire

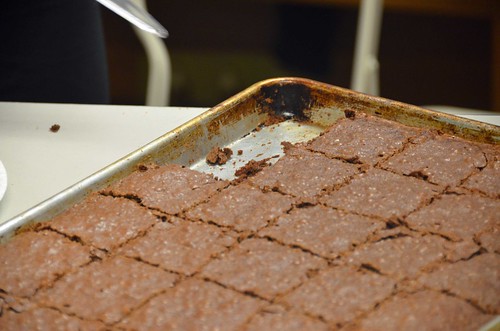
We made pans of brownies and cut them into 2.5”X2.5” squares (simple recipe below).

campfire2

Then we smashed Werther’s candies and cinnamon Jolly Ranchers in a food processer, spread their dust in a shallow foil-lined, Pam-sprayed pan, and baked them at 350F for 8 minutes until they were melted. We let them cool and then broke them into little jagged flames. One bag of Jolly Ranchers and and one bag of Werther’s should easily be enough to make flames for two big batches of brownies. I’d bake them in a 9x13 pan or medium cookie sheet.

campfire3

We topped the brownies with ganache and then broke Pirouline cookies into little log-sized pieces. We used one Pirouline cookie for each brownie. Cutting it in half and then breaking one half in half again for the smaller logs on the sides.


campfire1

Arrange you Pirouline cookies on top of the ganache-covered brownies to look like a little campfire. Insert flames and enjoy!

campfire

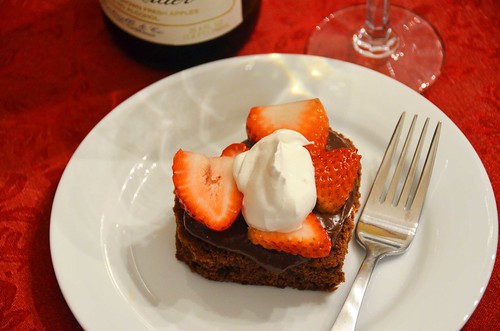
For Valentine’s Day, I used this same brownie and ganache recipe (adapted from ourbestbites.com), but used a heart-shaped cookie cutter to shape the brownies after baking. I topped the brownies with ganache, sliced strawberries and whipped cream. Perfection!


campfire4

Big Batch Brownies
Cut-and-Paste Recipe

1 1/3 cups all-purpose flour
5 Tbs unsweetened cocoa powder
1 ½ tsp baking powder
½ tsp salt
6 oz semi-sweet chocolate (chips are fine)
1 C + 6 Tbs real butter, cut into pieces
1 ¾ C sugar
6 large eggs, at room temperature
2 tsp vanilla extract

Melt chocolate and butter in a glass dish in the microwave until melted enough to combine into a smooth liquid, stirring every 30 seconds. Let the mixture cool for 10-15 minutes. Preheat your oven to 350F. In a large bowl, combine flour, cocoa powder, baking powder, and salt. Never use an electric mixer for brownies. You’ll want to stir the sugar into the chocolate mixture to combine and then add the eggs two at a time, beating them in with a wooden spoon until they’re well incorporated. Beat in vanilla and then gently stir in the dry ingredients until there are no visible white spots. You want everything combined but not over-mixed.

Spray the bottom of a 12X17” jelly roll pan with cooking spray or line it with a silicone mat. Pour your brownie batter into the pan and spread it out evenly. Bake for 20-25 minutes or until a toothpick or stick of spaghetti inserted into the center comes out almost clean. A few crumbs are good but you don’t want it to come out wet with batter.


Chocolate Ganache
Cut-and-Paste Recipe

1 C heavy cream
1 heaping cup (8 oz) semi-sweet chocolate chips
1 tsp vanilla

Heat the cream in the microwave in a glass dish until small bubbles form around the edges, about 2 minutes. Add the chocolate chips to the bowl and immediately cover with plastic wrap. Let sit five minutes. Whisk chocolate and cream with a fork until dark, creamy and smooth. Whisk in vanilla. This can be used immediately as a warm thin chocolate sauce or cooled to thicken. If placed in refrigerator, this will become thick and spreadable. This makes a perfect cake filling.

Saturday, February 18, 2012

White Chicken Chili / Tortilla Soup

One of my favorite recipes that Kathryn has ever made for me. She first introduced me and this chili when I was just a couple of days home from the hospital with my first baby almost eight years ago. It has been a staple in our home ever since. We love it. It is easy, delicious, and has won chili cookoff contests.

Start by cooking your chicken. The recipe suggests sauteing cubed chicken breasts in 1 tsp olive oil until just cooked through or starting to turn golden brown. I prefer to cook my chicken breasts in my pressure cooker with some green salsa over them. The chicken shreds and has a wonderful flavor this way. Either way, cook your chicken, and set it aside.

The next job is preparing the tomatillos. An excellent task for tiny hands. My 22 month old loves peeling tomatillos. I always make a triple batch, so it takes awhile. Give those kiddos a job, I say. They need to be husked, washed, and chopped.


I prefer to chop the tomatillos finely, because there is less of a final texture issue for my kids. I use the magical food chopper that I got from Emergency Essentials. Best $16.95 I ever spent. Takes a couple of minutes to dice these all beautifully.

Next finely dice your onions. I used purple this time, because it's what I had on hand. It tasted wonderful in the finished chili.

Cook onion, tomatillos, jalapenos and garlic in 1 T olive oil. Cook on high for about 5 minutes, until they release their juices. Then add spices, and chicken broth. Bring to a boil, then reduce heat and simmer for thirty minutes.

Add beans, corn, cilantro, lime juice, remaining spices, and chicken. Mix cornstarch with water and pour into simmering chili to thicken.

Serve with sour cream and shredded cheese and tortilla strips or chips.


Cut-and-Paste Recipe
Chicken Tortilla Soup
(Adapted from the Low-fat Living Cookbook by Leslie L. Cooper)
1 teaspoon + 1 Tbsp olive oil
1 lb boneless skinless chicken breast, cubed
1 onion, chopped
10 tomatillos, husked and chopped
1-2 jalapeno peppers, seeded and chopped
6 cloves garlic, minced
2 tsps chili powder
1 tsp dried oregano
1 tsp sugar
Salt
3 cups chicken broth or vegetable broth
2 cans (15oz each) pinto beans, rinsed and drained =3 C (Sometimes I use a mixture of pinto, black, and great northern beans.
1 1/2 cup corn kernels (1 can)
1/3 large bunch chopped fresh cilantro
1 Tbsp lime juice
Ground black pepper
1 Tbsp cornstarch
1 Tbsp water
1 tsp ground cumin

Start by cooking the chicken. Either sauté until just cooked through and starting to brown in 1 tsp olive oil, or cook in pressure cooker or slow cooker with green salsa over top. I prefer the second method. Set chicken aside.

Cook onion, tomatillos, jalapenos and garlic in 1 T olive oil. Cook on high for about 5 minutes, until they release their juices. Then add spices, and chicken broth. Bring to a boil, then reduce heat and simmer for thirty minutes.

Add beans, corn, cilantro, lime juice, remaining spices, and chicken. Mix cornstarch with water and pour into simmering chili to thicken.

Serve with sour cream and shredded cheese and tortilla strips or chips.